


The world of digital audio workstations (DAWs) can be a bit intimidating for newcomers. With a seemingly infinite number to choose from, it can be difficult to even know where to start. Today I’ll share some tips to help you get started using a Garritan library with my favorite DAW, Cubase.
There’s no shortage of DAWs out there, with their own unique workflows and layouts. I would highly recommend trying a few out for yourself to see which one fits you best. As someone who does a lot of production work, Cubase is a great option for me. It offers a wealth of creative tools that you won’t necessarily find in more recording-oriented programs like Pro Tools or Logic. Although I’ll be covering Cubase in this article, many of the concepts can be applied to any DAW.
Setting Up a Garritan Instrument
To get started, we’ll first need to open an instance of a Garritan library in Cubase. With a new Cubase project open, go to Devices > VST Instruments and select the Garritan library from the Instrument menu – in this case I’ve selected the CFX Concert Grand.

Click Add Track and the CFX Player will display along with a new MIDI track ready to record the selected Garritan instrument.

Recording, Entering and Editing MIDI
Click the record and and play buttons from the transport at the top of the screen. A new MIDI track will record your performance from the ARIA Player.
![]()
If, like me, you’re not much of a pianist, you can also import a MIDI file to be played back by your Garritan library. To do so, simply drag the MIDI file onto the empty track.
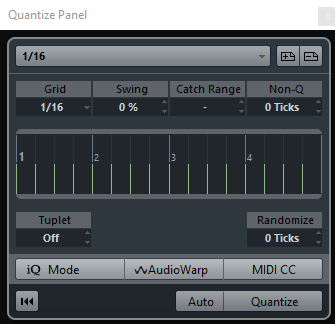
Once you’ve recorded your performance, or imported a MIDI file, you can easily quantize playback or customize individual notes. To access the quantization settings, select the track by clicking on it and go to Edit > Quantize Panel. Finale users should be familiar with most of the settings here. Select the smallest note value from your performance and click Quantize.
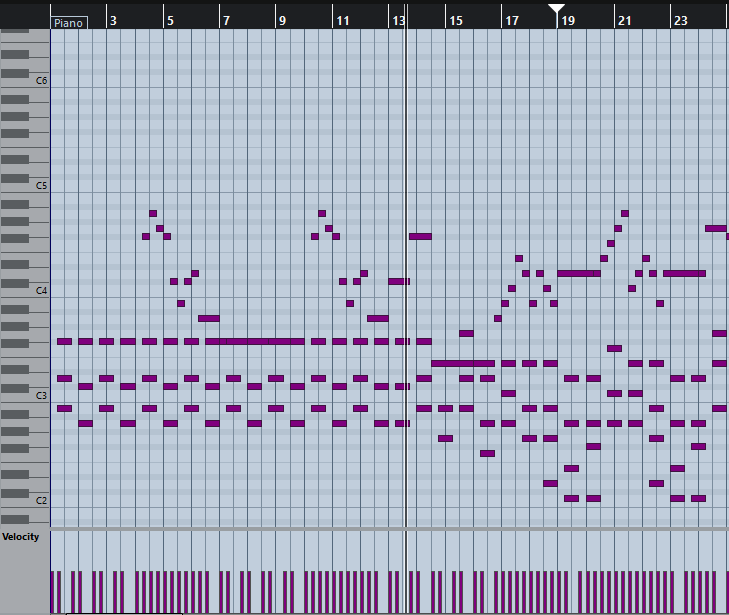
You can also edit each note pitch, length and key velocity by opening the Key Editor from the Edit menu. This can be helpful to quickly correct a wrong note or change the dynamics of a single note or section.
Using Audio Effects
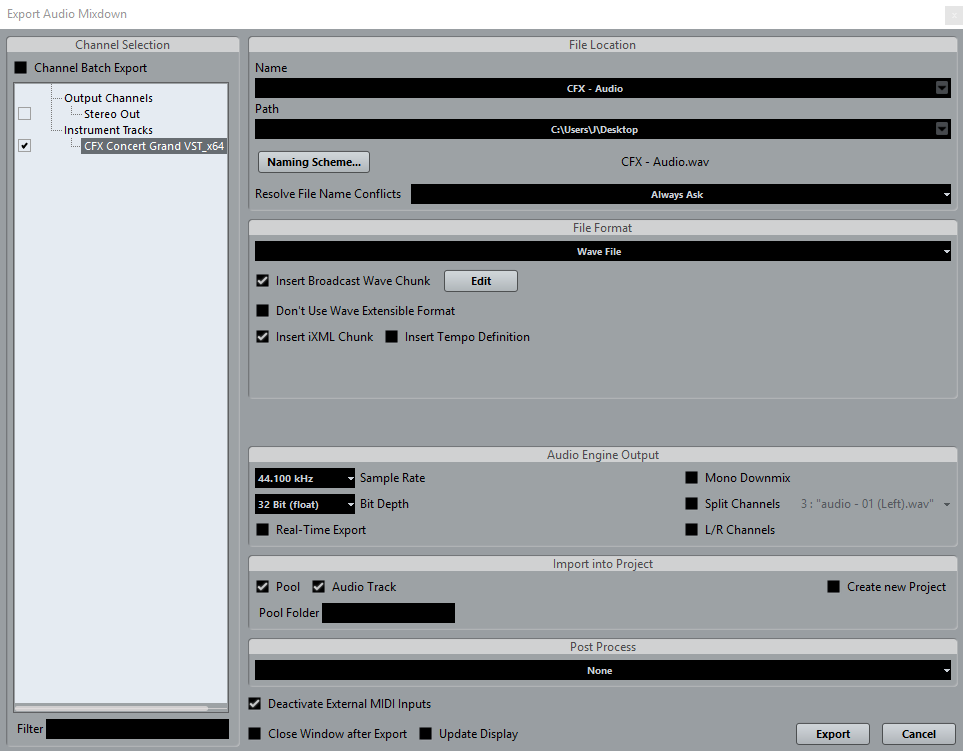
Although Cubase offers many tools to edit MIDI, where the program really shines is the large library of audio effects. We can take advantage of these with our Garritan track by first bouncing it to audio. This is easily done. Open the File menu and choose to Export > Audio Mixdown. Next, select the Garritan library from the left menu to make sure that we’re not bouncing the entire project. Under Import into Project, select Audio Track to ensure that the exported audio file is added to a new track in your project.
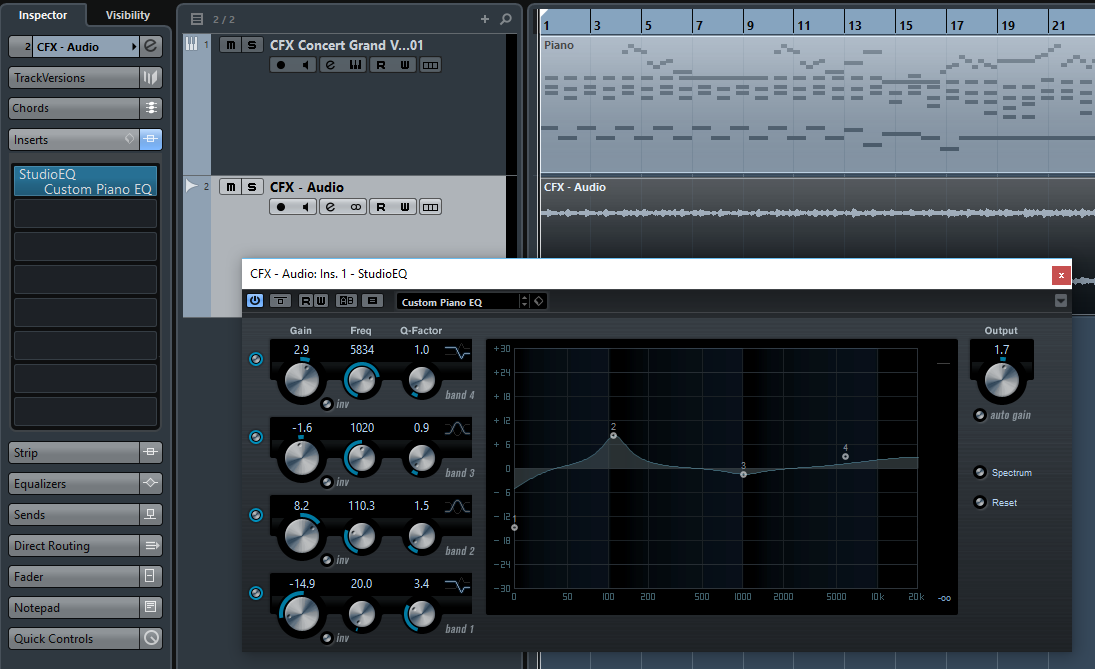
Once you’ve exported the track to audio, you’ll have access to all of Cubase’s audio effects. Select the new audio track and click Inserts from the Inspector. Click one of the open spaces to see all available effects. Once you select an effect, its control window will appear. Here you can select a preset, or dig a bit deeper and experiment with each parameter.
(For time-based effects (reverb, delay, etc.) it’s generally preferable to use Sends, rather than Inserts. This will preserve the integrity of the original track and give an extra level of control in the mixer.)
Hopefully, this basic guide will help to give you a starting point and the confidence to jump into Cubase (or your DAW of choice) and start experimenting. The best way to learn any DAW is to simply spend some time with it and start exploring each feature. Once you have your basic file started following the steps above, I’d recommend hitting Save As, giving the file a new name and just having fun trying everything out for yourself. This way you can always return to your starting point and experiment some more.
 Jon Cielinski joined MakeMusic’s technical support department in 2011. Today he’s a SmartMusic product specialist, answering SmartMusic questions for MakeMusic employees (including assisting customer support representatives) and collaborating with developers on future versions of SmartMusic.
Jon also works as a music producer and recording engineer. When not on the job he enjoys exploring the trails around Boulder and taking in local shows.


